Help with Your Employee Access
Whether you are a long-time MultiCare team member or newly hired, resources to help you communicate, collaborate and thrive while on the job are at your fingertips. We invite you to access the resources below.
For assistance with your MultiCare employee account, resetting your password and more:
- See below for instructions on setting up Microsoft Authenticator MFA for Android and Apple devices
- Citrix Workspace must be downloaded to your device in order to access MyPortal. Remote access options may not work for all users. IS&T is not able to help troubleshoot on personal devices.
- Log in to the Point MultiCare intranet to access additional tools and resources
If additional support is needed, MultiCare employees can call the Information Services Help Desk at 253-403-1160.
Multi-factor Authentication (MFA) Setup
Enrolling in multi-factor authentication is required to access your MultiCare account from external networks. Below, you will find instructions to install and configure Microsoft Authenticator on your Apple or Android device.
Note: If you get a new phone, you must first contact the service desk to have your old phone removed from Multicare’s system before you can add MFA to a new phone.
-
-
Prerequisites
- Set aside 15 minutes of your time to download the smartphone app and enroll in MFA.
- Have your Android available and connected to the internet (cellular or Wi-Fi).
- Know your Google Play Store ID and password [This is not required for MultiCare-owned Phones]
- Microsoft Outlook application and Microsoft Authenticator application.
- Have a computer available that is connected to the MultiCare internal network or connected to the internet (i.e. a home computer). Note: register using a MultiCare computer or a computer that you own or control – don’t use a hotel, library, or other computer that may be insecure.
- Know your MultiCare username and your MultiCare password.
Instructions
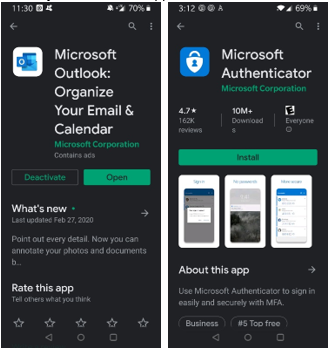
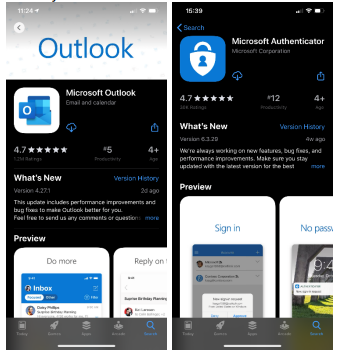
- On your Android, open App Store, search for and download both the Microsoft Outlook and Microsoft Authenticator applications.
- Open the Microsoft Authenticator App on your Android device.
- If prompted, allow Notifications for the app. This is an important feature of the app.
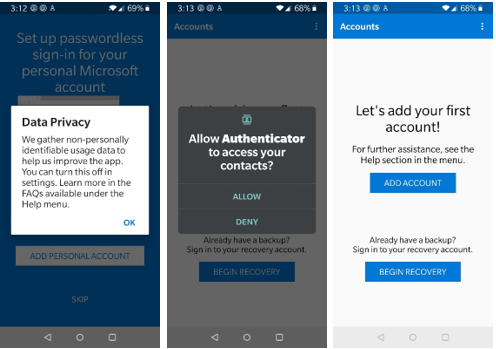
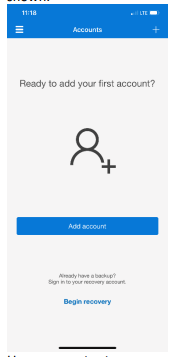
- When the app opens, if the Data Privacy notice is shown, click OK. Then press Skip three times until the Ready to add your first account? page is shown. If the app asks to access your contacts, click Allow.
- Use a computer to open a private web browser window. Click on the links below for instructions.
- On your computer, using the private web browser window you opened from step #1, navigate to https://aka.ms/mfasetup and sign in.
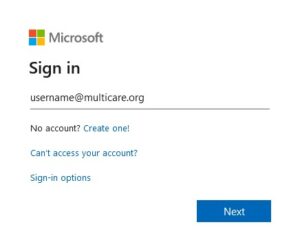
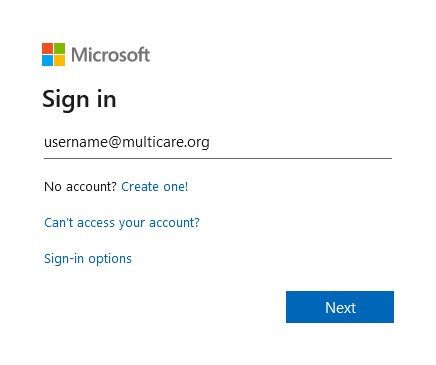
- Enter your MultiCare-assigned account <username>@multicare.org in the Sign in field and click Next.
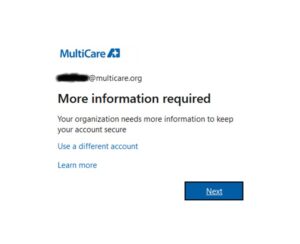
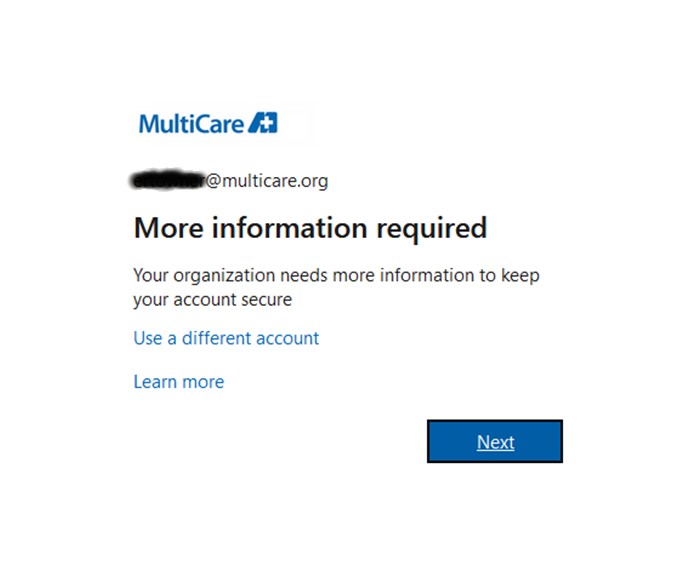
- Enter your MultiCare password and click Next. You will be prompted with a window that states More information required. Click Next.
- You will be directed to the Keep your account secure page. Under the section Microsoft Authenticator, click Next.
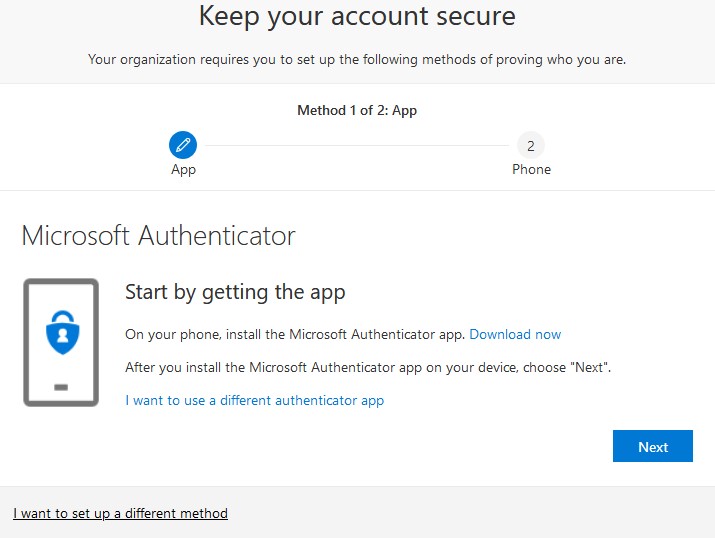
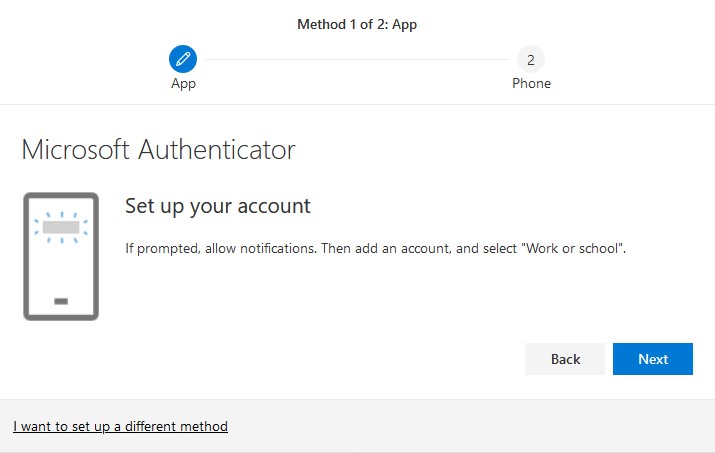
- Under Set up your account click Next

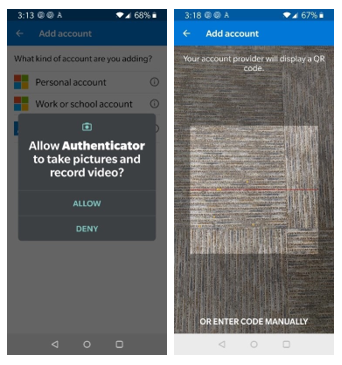
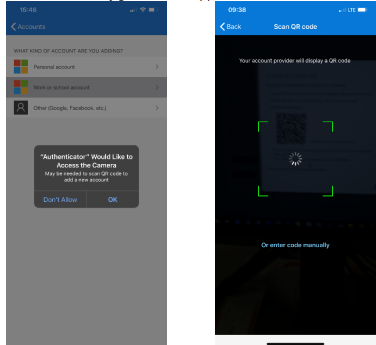
- From your mobile phone, open the Microsoft Authenticator app you downloaded from Step 1. In the app, select Add account. Under What kind of account are you adding, select Work or school account. If you haven’t granted permission to access your camera, do so. Then scan the QR code that is on the Configure mobile app screen. Authenticator will add the account. Click Next.
- The QR Code pop up you will see, once scanned click Next.
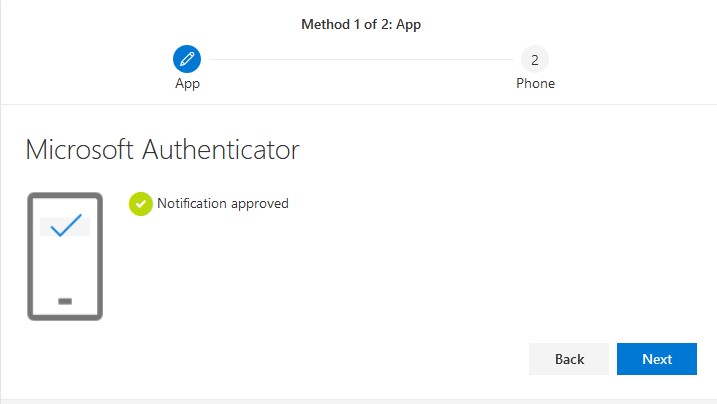
- You will be sent a push notification to your mobile phone, click Approve. Once complete, a message saying Notification approved will appear. Click Next.

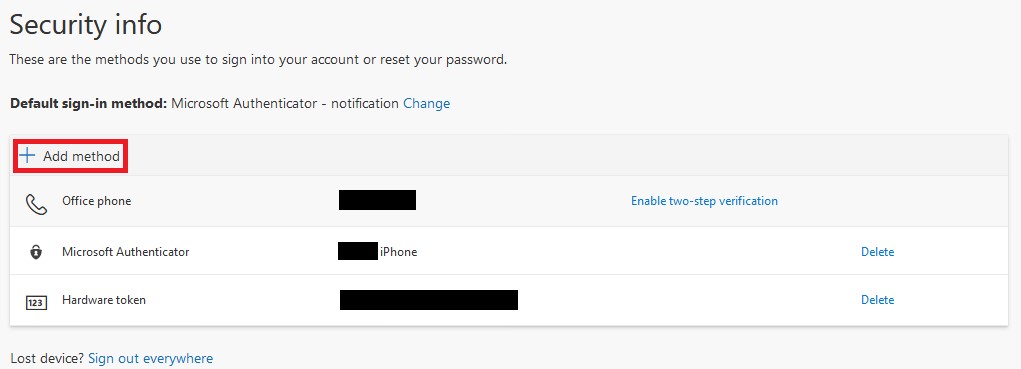
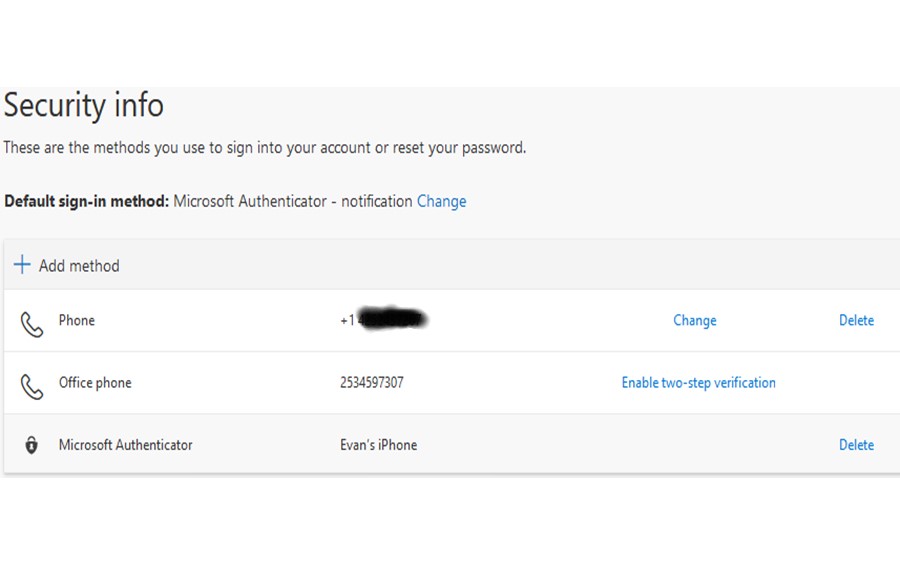
- You will now see the final Security info page. If you don’t see an entry for “Phone” or “Alternate phone” click Add method. Note: “Office phone” does not count as an authentication method.
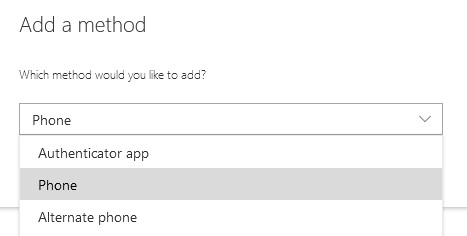
- Select either “Phone” or “Alternate phone” and click Add.
- Follow the on-screen instructions to add your cellphone number. Select United States (+1) followed by your 10-digit mobile number (ex: 2535555595).

- You will now see the final Security info page. Verify the information is correct and you can close the web page.
- To view a video of the registration process, follow this link: https://aka.ms/mfavideo
-
-
Prerequisites
- Set aside 15 minutes of your time to download the smartphone app and enroll in MFA.
- Have your iPhone available and connected to the internet (cellular or Wi-Fi).
- Know your Apple ID and Apple App Store password [This is not required for MultiCare-owned Phones]
- Microsoft Outlook application and Microsoft Authenticator application.
- Have a computer available that is connected to the MultiCare internal network or connected to the internet (i.e. a home computer). Note: register using a MultiCare computer or a computer that you own or control – don’t use a hotel, library, or other computer that may be insecure.
- Know your MultiCare username and your MultiCare password.
Instructions
- On your iPhone, open App Store, download Microsoft Outlook and Microsoft Authenticator
- Open the Microsoft Authenticator App on your iPhone.
- If prompted, allow Notifications for the app. This is an important feature of the app.
- When the app opens, press Skip three times until you see “Ready to add your first account?”
- Open a private web browser window on a computer. Click on the links below for instructions.
- On your computer, using the private web browser window you opened from step #1 and navigate to https://aka.ms/mfasetup and sign in.
- Enter your MultiCare-assigned account (<username>@multicare.org and your password) in the Sign in field and click Next.
- If prompted, enter your MultiCare username password and click Next. You will be prompted with a window that states More information required. Click Next.
- You will be directed to the Keep your account secure page. Under the section Microsoft Authenticator, click Next.

- Under Set up your account click Next
- From your mobile phone, open the Microsoft Authenticator app you downloaded from Step 1. In the app, select Add account. Under What kind of account are you adding, select Work or school account. If you haven’t granted permission to access your camera, do so. Then scan the QR code that is on the Configure mobile app screen. Authenticator will add the account. Click Next.
- The QR Code pop up you will see, once scanned click Next.
- You will be sent a push notification to your mobile phone, click Approve. Once complete, a message saying Notification approved will appear. Click Next and then Done.
- You will now see the final Security info page. If you don’t see an entry for “Phone” or “Alternate phone” click Add method. Note: “Office phone” does not count as an authentication method.

- Select either Phone or Alternate phone and click Add.

- Follow the on-screen instructions to add your cellphone number. Select United States (+1) followed by your 10-digit mobile number (ex: 2535555595).

- You will now see the final Security info page. Verify the information is correct and you can close the web page.
